Monday, May 31, 2010

Wood fired ribs and a new chef!


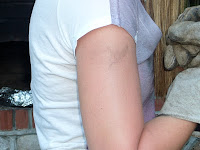
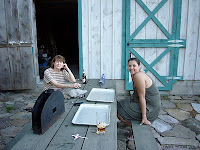
Amanda took over our wood fired oven and she created amazing ribs with diced potatoes in sweet cream butter! Watching her keep the fire going and handle the ribs being moved around in the oven with Karl's welding gloves was priceless! She even had the black marks on both shoulders that Karl seems to have every time he makes pizza. The best part was I spent the day relaxing by the pool and there was no clean up involved. No, I am sorry the best part was the ribs! The recipe for the ribs came from K.C.'s friend Frank. He made the ribs on his grill for Amanda and K.C. at his home in Philadelphia after a concert they attended. I am really impressed with his cooking and I am sure it came from his Mom and her great cooking skills! The recipe for the potatoes is from my BFF Cathy. She makes the same potatoes on the grill and adds broccoli and mushrooms with clams. We have it every year at her lake house for the 4th of July. She will be so happy that I spelled her name with a "C" instead of a "K" like I always do!
I love how a recipe and who shared it with you and where you first enjoyed it brings great memories back of the fun time with friends and family. I keep telling "M'', Amanda's friend spending time with us this summer, how she will always remember us when she eats pizza as the crazy food obsessed family with a brick oven in their backyard! I hope you try our recipes in your brick oven and make some wonderful memories with good friends and family! I think the entertaining part of having a wood fired oven is truly the best part. We have had more fun and more people in our yard with the oven then we ever had before.
I would love for you to leave some comments for me if you have a brick oven and if you don't have a brick oven I know where you could get one!

Amanda's Oven Technique

To get the oven to temperature Karl and Amanda started a fire and brought the oven to white hot ( The oven turns completely white. This is how you tell the oven is ready for pizza). They let the fire burn down to hot coals with the flame reaching about a 1/4 of the way up the oven side and a temperature of 300 for the 7 hours the ribs cooked. Amanda moved the rib packets around about every 1/2 hour and the potato packets she kept away from the fire. The fire was kept to the side and she added wood and natural charcoal as needed to maintain the 300 temperature. She baked everything for about 7 hours while we relaxed by the pool.

Potatoes and Sweet Cream Butter by Cathy

Dice Potatoes ( 1 or 2 per person)
Slice sweet onion ( 1 for 2 or 3 persons)
dot with sweet cream unsalted butter (about 2 Tbs per packet)
salt and pepper to taste and wrap in individual foil
Cathy adds broccoli,mushroom and clams and cooks on her grill
we placed in the oven and let them roast all day

Ribs by Frank

(this is for 2 racks of ribs)

The Night Before

Rub Concoction
About a cup of brown sugar
Around 1/4 cup of salt
About 2 tablespoons of garlic powder
A Tablespoon of black pepper
2 tablespoons of "Mrs Dash" seasoning
1 tsp - 1 tbs of cayenne pepper to taste

- Combine all ingredients, set aside
-Place ribs in tinfoil boats, so that you can place the ribs in, and have the bottom be waterproof and top be able to crimp around them

-Rub ribs thoroughly with concoction and seal them into the tin foil boats, leaving one end completely crimped, and the other able to be opened to pour "sauce" in.
-Double or triple layer foil to prevent leakage.

Day of Baking

"Sauce"
1 cup apple cider vinegar
1 cup apple juice
1 package onion soup mix

- Mix "sauce" together and distribute between the foil boats (little more for the bigger, less for the smaller obviously)
- Crimp ends together


Friday, May 21, 2010

Calzone and a great "almost"summer night


Calzone "Wood Fired" of course! Mmmm...

Finally some summer weather! Friday night and a new wood fired recipe book from K.C. for my birthday last month will make a great night along with the weather. The book is by Andrea Mugnaini and is called The Art Of Wood Fired Cooking. Tonight we are using her dough recipe and a recipe for sausage vegetable calzone. The book gives some good tips on how to manage your fire when making different foods. There are different methods for grilling, baking bread or baking pizza. For the calzone we placed the fire to one side and put the calzone opposite to the fire and towards the front of the oven. We kept the temperature high at around 700*F. As the floor gets hotter the flames get larger. The dome should be void of any black spots and the flame should be rolling to mid point of the dome. This is explained in more detail in the book and you are given details for cooking all the recipes in the book. This worked very well for us and the calzone was done in about five minutes! Cooking with wood is so fast!
The dough recipe was a little different from doughs I have made. It uses active dry yeast you mixed with warm water (110* to 115*F) for 5 minutes to activate. I usually use instant or bread machine yeast. The recipe can be altered to make in 3 hours,24hours or 48 hours. I used 24 hour dough as I like the flavor of cold fermentation dough. It was more bread like then the thin crust we are used to and had a great flavor. I wish I could find a store that sells 00 flour as the recipe calls for it has a 10.5 percent protein and is ground very fine. I used bread flour and it was good.
The sausage and vegetable calzone was easier then making pizza and I liked that everything was prepared on Thursday to bake on Friday night after work!
I will share the vegetable sausage calzone recipe with you and you can try it with your own dough.

Sausage and Vegetable Calzone from The Art Of Wood Fired Cooking

1/4 c chopped roasted sweet red bell pepper
1/4 c sauteed spinach, drained well
1/4 pound spicy Italian sausage sauteed and cooled to room temperature
1/3 c fresh ricotta
1/2 c diced fresh mozzarella
1/4 c shredded fontina
1 T grated pecorino
1 teas fresh oregano leaves
1 8 to 10 oz. pizza dough

Combine all ingredients except dough in a bowl and mix well. Mound mixture onto one half of stretched dough. Fold other half over and pinch to seal. Place in oven towards the front and bake about 5 min until puffed and stiffened. Pull forward and pierce with a sharp knife to release steam and brush with olive oil. Return to oven and bake 2 to 3 minutes more. Enjoy!


There are so many tips in this book. I learned why it is best to hand press the dough and not use a rolling pin. The rolling pin presses out the air and makes the crust dense. Hand rolled dough is light and tender and also cooks faster. The recipes are for everything from seafood to peach crisp. I can't wait to make a Thanksgiving turkey and I am going to follow the suggestion to try it out this summer before the holiday! Karl liked the chapter on making the right fire for the food you are making. I will share more as I make the recipes.
If you have a Round Boy Oven I suggest you try this book and learn more delicious ways to enjoy cooking with fire!

Sunday, May 9, 2010

Designing a Pizza Oven to sell!


When Karl designed and made our oven we had no thoughts to make ovens to sell! Our good friends and neighbor Joe and Chris who also run a apple orchard wanted an oven. They asked Karl to design an oven they could bake apple pie and dumplings with to use by the orchard when they open in the fall and move by the pool for entertaining in the summer. Karl built the oven and it has wheels to move it. We spent a great Fall season making pizza for their customers. They make apple cider at the end of the season with old fashioned cider presses. Last year Amanda and her college friends and Joe and Chris invited friends and customers. I was amazed at all the apples we used and how much work to turn the press by hand! Karl and I made over 20 pizzas to feed the hard workers. It was a really fun day and I can't wait for the end of the next season to do the same. I wish I took pictures to share with you and I will take lots of pictures this fall. Something for you to look forward to seeing!
We had so much interest in the oven and that is what got Karl working over the winter on a pizza oven that was easy to set up and affordable to own. The oven he made for Chris and Joe is not the prettiest oven but the way it bakes and works is just like our fancy oven. Karl and K.C. our son started throwing ideas out and they began building very crude forms to pour the pieces. Karl's brother and partner Harry wasn't too sure we could make an oven and if it would be something that people would want, but he got involved too. He just recently told me he wasn't sold on the idea until he took the oven home and he and his wife Chris started making pizza. He now calls himself "Mario the Pizza man" and they are entertaining and making pizza all the time. Harry and Chris just made our first oven sale and Harry, Karl and K.C. are partners in the oven business!
Karl and Harry are working on another design with a brick base and oven that will be a mid price option for people.
We have a logo that a couple from Ireland designed for us and K.C. and a school friend are working on a web site. This is so exciting for us and I can't wait until we sell a few more and people see how much fun and what a whole new way of entertaining this is! The fact that creating your own fresh pizza that is better then any pizza you have ever ate is also a great reason to have your own wood fired oven.
I think I have moved on from just pizza! My favorite is steak in the oven. I just bought a new cookbook and it is all kinds of meals all cooked with fire in a brick oven. I will share them all as I make them.
For Mother's Day we visited K.C. in Morristown N.J. and he treated us to brick oven pizza at a new restaurant by him. I am really not surprised that we are seeing more brick oven cooking every where we go. I have been seeing more on T.V. also! It is a truly superior way of cooking. I love that it is outside and great for having friends over and it is so fast!
I hope you enjoy the pictures. The first oven Karl created and the base price oven we have for sale. I also included the oven we sold and the creative way they used Versa Loc to build it into their outdoor kitchen.